Canonical provides Ubuntu flavors of mainline kernel. However I wanted to install the latest kernel, straight from the Linus's git repo . :)
I used a virtual machine environment to compile and install the kernel. We can install the following
software packages using Ubuntu's package manager (apt).
- Qemu - virtualization platform
- Virt-manager - GUI for qemu
I used 14.04 Ubuntu distribution - downloaded it from the canonical site.
Create a new virtual machine and install Ubuntu, log in to the machine. From here on-wards, we are inside our VM.
Now we checkout the mainline kernel from Linus's github repo.
> git clone --depth 3 https://github.com/torvalds/linux.git
Here i have selected depth as 3 to avoid entire version history checkout. Go inside the linux source directory.
> cd linux
Lets first change the target name of our kernel by editing the Makefile, change the param to,
EXTRAVERSION = -test
Now we have to prepare the configuration of the target Linux kernel. Here we are configuring the set of modules that we want to package with our kernel. Manual config is a tedious task. We have two options,
1. Get the config of the current Ubuntu distribution and reuse it.
2. Get the list of loaded modules of the currently running system and use it as the config.
If you are following the first option, then copy the config-xxx file found under /boot directory of Ubuntu to our Linux source directory as .config
>cp /boot/config-3.13.0-40-generic .config
>make oldconfig
However this config has large number of modules, which don't get loaded at runtime at all. Hence we can create a much light weight system by creating a config out of our currently loaded modules in the system.
Hence I used,
>make localmodconfig
Since our mainline kernel is the bleeding edge, it will require some entirely new configs. The config program will prompt you for input, accept the default values. (just press and hold ENTER)
Now we have config suitable for our target environment. Lets compile the kernel source,
> make > /dev/null
Once the build is complete, our shiny new kernel image can be found at:
linux/arch/x86_64/boot/bzImage
Next step would be to install it. Before that we have to install the kernel modules we built along with our kernel.
>sudo make INSTALL_MOD_STRIP=1 modules_install
This will install the new modules under, /lib/modules/4.1.0-test+
Now install the kernel,
>sudo make install
Create the initramfs file system for our new kernel, This is the ram file system that is get loaded before real file system setup.
>sudo update-initramfs -c -k 4.1.0-test+
Finally update the grub, so it can find our new kernel during the boot process.
>sudo update-grub
Now if you examine the /boot directory, you should see newly created files,
- vmlinuz-4.1.0-test+
- System.map-4.1.0-test+
- config-4.1.0-test+
Before restart, lets configure the GRUB menu, so that we can choose our kernel during the boot process. Edit, /etc/default/grub file and comment out the below lines. Otherwise, the grub would not display the splash screen and will go on to boot the latest kernel.
#GRUB_HIDDEN_TIMEOUT=0
#GRUB_HIDDEN_TIMEOUT_QUIET=true
Restart the virtual machine.
During the boot process select, 'advanced options' from grub menu
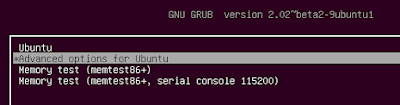
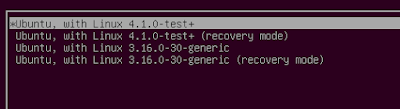
And select the new kernel.
Once you are log in to the system, just double check using the shell command,
During the boot process select, 'advanced options' from grub menu

And select the new kernel.

Once you are log in to the system, just double check using the shell command,
>uname -a
We are done.!